GeoMaestro
Extra KeyKit tools
The GeoMaestro distribution includes a few KeyKit tools and other goodies not directly related to the system. They are documented here.
Tools:
Object(s):
Clavier
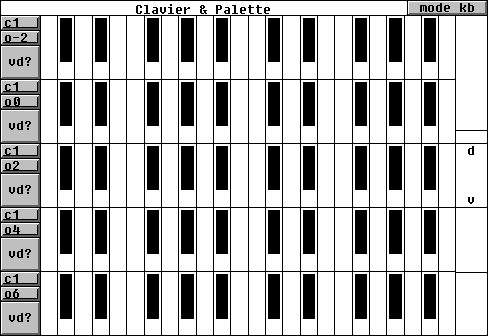
This is basically a mouse keyboard. The two sliders at the right set the duration and volume of the notes; these values can be overriden by clicking on one of the "vd?" buttons, so that each row can have independant settings. The "c.." and "o.." buttons set the MIDI channel and octave of the corresponding row, so that completely different sounds can be produced by different rows.
This tool was intended to make experiments in blending different instruments sounds in one, with the idea of eventually creating interesting "sonic" event nodurs to be used within GeoMaestro.
By clicking with the right button on a key, you can affect a keyboard letter to it. Pressing the "mode kb" button makes the tool listen to the keyboard, so that you can use it along with the mouse to play the tool. If several different keys are affected the same letter, they will be played at the same time. Moreover, if you give time values (in clicks) along with the letter, this defines a repeat template.
For example, right-click on a key and type
a 20,90,120
then right-click on another key and type
a
then right-click again on a third key and type
b 0,100
Now if you toggle into keyboard mode and type "a", you will hear a whole phrase made out of the first key playing at time 20,90 and 120, merged with the second key (which plays immediately)."b" will play a two-notes phrase.
If what you played pleased you, press <SPACE> to get out the keyboard mode: Snarf holds the last bunch of Recorded
(two bunches are separated by RecordedSpace, default 2b)
Note: The .get() and .bang() methods of this tool return the last bunch of notes played in keyboard mode.
Snarf Box
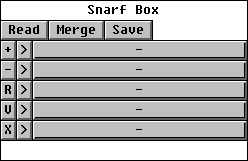
As stated by its name, this is a box where you can keep phrases to Snarf away...
All five long buttons display the same list of phrases, so that you can have five different phrases at hand. Clicking a [>] button will Snarf the corresponding phrase.
Clicking [+] will add the current Snarf to the list: you must give it a name.
Clicking [R] lets you rename the item in the same row. This will be repercuted everywhere (as I said before, there is only one list here).
Clicking [-] removes the corresponding item
Clicking [V] adds an item from a phrase global variable
Clicking [X] exports the correponding (same row) item value to a global variable
[Save] and [Read] handles the whole collection to/from a file. [Merge] reads a collection from a file and merge it to the current list.
Note: The .get() and .bang() methods of this tool return the phrase slected in the upper row.
Drum Picker
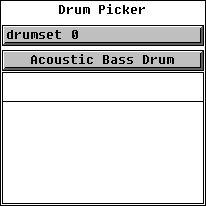
This tool lets you Snarf a drum note among all the available drum sets. The slider lets you define the note volume.
If you're not using the ACPATCHES system, it will simply display the standard GM set and is thus not a really interesting tool.
On the other hand, if you're using TiMidity++ as associated synth (in the way it is described here), you will have in this tool the details for all drums defined in the TiMidity++ configuration files ( *.cfg ).
The .get() and .bang() methods of this tool return the selected drum note.
Ctrl Shaper
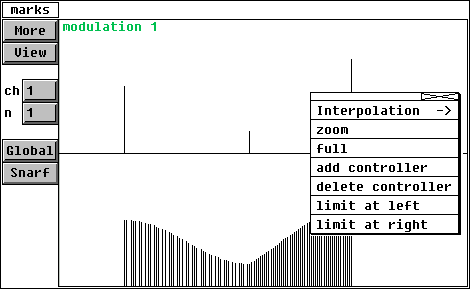
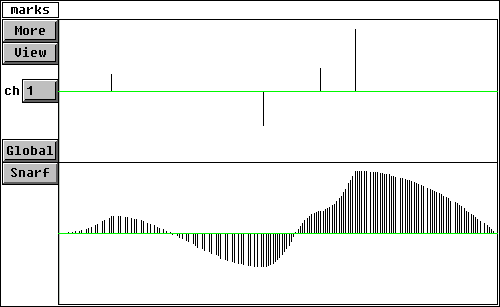
Here the idea is to create a smooth and finely-defined controller phrase out of a few initial peaks. This tool was primarily developed in order to have GeoMaestro set-ups drive a soft synthesizer such as AudioMulch. In this kind of software, sliders can be moved according to MIDI controller messages, and we need great precision since audio synthesis can be very sensitive to their motion. On the other hand, the basic GeoMaestro projection mechanism is not efficient in generating ramps: it mostly produces discrete notes or peaks.
So in this tool, the upper phrase window displays the source phrase; the bottom one displays the output (which you can [Snarf] or get by calling the tool's .get() method)
More exactly, what is displayed depends on the [View] setting:

The two menubuttons labelled "ch" and "n" let you define which controller you want to edit (the "current controller"). If this controller is registered in the CtrlMap array, its name(s) will appear in green at the top of the window, like "modulation 1" in the above picture.
[global] interpolates all controllers of the current type in the input phrase. If you want to define a type of interpolation between two consecutive controllers, click in between and choose the interpolation in the pop-up menu.
This pop-up menu also lets you create or delete a controller, and also set the "limits", that is: the values for the current controller at the begining and the end of the phrase.
Using the mouse in the bottom window, you can directly draw controllers and create or correct any shape. The precision depends on the window range: use the "zoom" and "full" items in the pop-up menu to change it. Both windows have the same range.
Pitch Bend Shaper
... works as the Ctrl Shaper, only with pitch bend messages...
Customization system
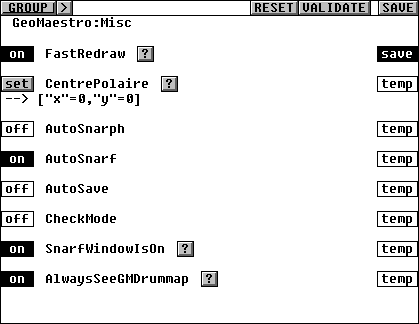
This tool provides an overview of all settings customizable through global variables (parameters).
You can browse through the different topics with the "GROUP" menu. Depending on the number of parameters in the choosen group, one or several pages are available: click on the [>] button to go to the next one. If there is none, you will be back to the first page.
Each page displays a bunch of parameters along with their current value. You can set them through the [set] button or the [on]/[off] toggle. Changes are only taken into account when clicking the [ACTIVATE] button, at the upper right of the tool; this only applies to the current page. Clicking [RESET] cancels all modifications that have not been activated; an automatic reset happens every time you change the current page.
The [SAVE] button allows for permanent settings. It does so by writing a function hard-coding the values for choosen parameters (parameters whose [temp]/[save] toggle is set to [save]). Don't forget to activate the changes you made, as saving the parameters is completely independent from activating changes.
The default function is called GeoMaestroCustomizedParameters and is written in the ../userlib/settings.k file. Delete this file if you want to get rid of the settings, or do another [SAVE], which will override it.
This function is called at the end of your GeoPostInit(), with the following code:
if (typeof(GeoMaestroCustomizedParameters)=="function")
    GeoMaestroCustomizedParameters()
Saving multiple settings
You can change both function name and file name (go to the "Custom tool" group), so the tool actually lets you save as many different settings functions as you want. It is then up to you to call them when necessary.
Each function must live in a different file, because the tools rewrite the file for each [SAVE] operation.
Adding new entries
You can add you own parameters to the tool by calling the function DefCustom():
DefCustom("MyParameter",
          "this is an interesting parameter",
          "boolean",
          "MyGroup:ThisSubGroup:ThisSubSubGroup")
This will add MyParameter to the group MyGroup -> ThisSubGroup -> ThisSubGroup, with a [on]/[off] toggle, because of the "boolean" type. For all other types you will have a [set] button. Use the "file" or "directory" types to have this button open a browser; use "color" instead of "integer" for a color index: this will display the color itself.
The second argument is a documentation string intended to explain the parameter usage. If it is not "", a [?] button will be displayed after the parameter name: clicking it will print the documentation string at the console. You may write several lines, but within a single string: use the newline character "\n".
If you want to make changes to the default groups, hack the DefineCustomizableParameters() in the GeoMaestro/lib/custom.k file. It is mostly made of DefCustom() calls.
Array Parameters management system
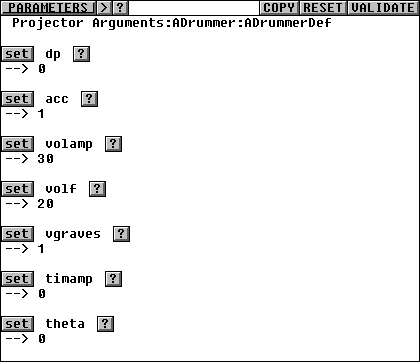
Similar to the Customization tool, this one lets you define from a GUI the inner fields of registed global array variables.
The tool is designed specifically for handling arrays such as the ones required by the Bulle and ADrummer projectors. These are one-dimensional arrays whose fields are parameters defining the behaviour of the projecting algorithm.
Other arrays include the mappings used by MidiCS(). This make it easy to define a set of transformations from MIDI to Csound, especially since you can copy an array with a single click. Note that all mappings registered in the tool are available in the RepWithEcho compositor plug-in, thanks to the function RegArraysOfType() (see below for more)
All registered arrays are automatically saved in GVARS
The array parameters can be arranged in groups and sub-groups. One or more pages display all their inner fields, excepted whose starting by "doc:", which are used to provide documentation strings. When many arrays are belonging to a same type (such as the ones accepted by Bulle), then their documentation strings are kept separatly in the ArrayParameterTypes array. It is then enough to define the type of the parameter when registering it to have all documentation available.
(more here later ...)
Code Includer

This very simple tool is associated to a *.kc file, a file containing KeyKit code but which is never read as part of the library.
The file is #included whenever the tool is restored, so this make it possible to have some code evaluated when reading a page, if this page features one or more wincluder(s).
The file is also #included when the [#include] button is clicked, or when the tool .bang() method is invoked. Use the [(set file)] button to choose which file is to be associated.
wfilebrowser

This is a class providing a simple file browser. It is used by the getafile() and GMbrowsefiles() functions.
On Windows, KeyKit invokes the usual browser so there is no real need for such a tool. It is quite useful for Linux, though.
To have it as the default browser, write the following line in your localprerc():
browsefiles = GMbrowsefiles
Note: this happens by default if your system is Linux and KeyKit version is above or equal to 7.1d (there is a bug in lsdir() for previous versions). If you don't like this, hack the file lib/wfilebrowser.k around line 40
Usage:
The [file] button lets you select an existing file, while you can use the [new] button for defining a new file name (associated to the current directory, which you can read at the top of the tool).
The [*] button lets you remove all search constraints if you want to. This means seeing all files in the current directory, and also changing the current directory (most often this is always possible, but the browser can be restricted to a given directory: see the "programming" sectionbelow)
Once you're happy ith your choice, hit [OK] to validate. [cancel] will return a "", which in most cases really cancels the operation.
Programming the browser:
(more here later ...)
wscore
wscore is a class defining a window of type "phrase" with a custom display. While it is much slower than its built-in counterpart, the result may be worth it, as you can see by comparing these screenshots:
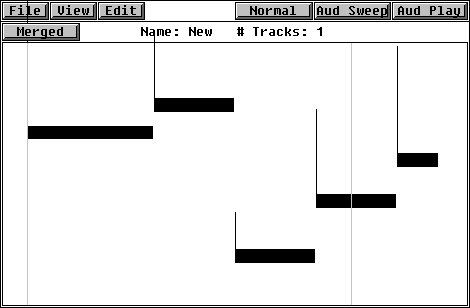
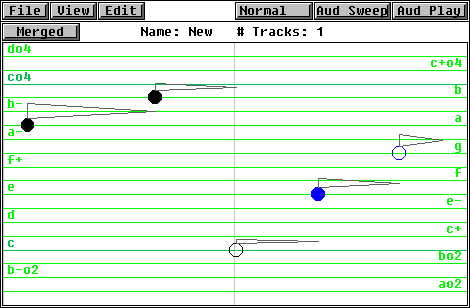
Both represent the same phrase,
'av127d150,bv60d96,cc2v35,ec3v80,gc4v100d50'
wscore displays the notes in different colors according to their channel; the note duration is represented by the length of the upper triangular flag, whose vertical width is proportional to the note volume. Also, the pitches are written on the score when there's enough room for that.
wscore is a work in progress: at the moment, it does not display controllers. In the future it will be extensively customizable, but for now you have to accept my own idea of what is a nice display...
The alternative display is enabled by calling the function
OverridePhraseWindowWithScore()
.. while it is cancelled by the command
RevertToUsualPhraseWindows()
If you installed kklib_hacks.k as described here, this is available through the main menu, in
Misc -> Phrase Windows -> Built-in / Through wscore
It is important to understand that this setting does no affect the existing tools: so, you can have regular built-in phrase windows coexist with wscore ones, which comes in handy since you don't always need a nice display, and most often want a fast one.
However, it is possible to change an existing tool by "reconstructing" it. Again, if you installed kklib_hacks.k, this is done through the Root menu at
Window -> Reconstruct
... just click on a tool window: the tool will be deleted then recreated (provided that its dump/restore methods work ok !), using whatever phrase window is currently turned on.
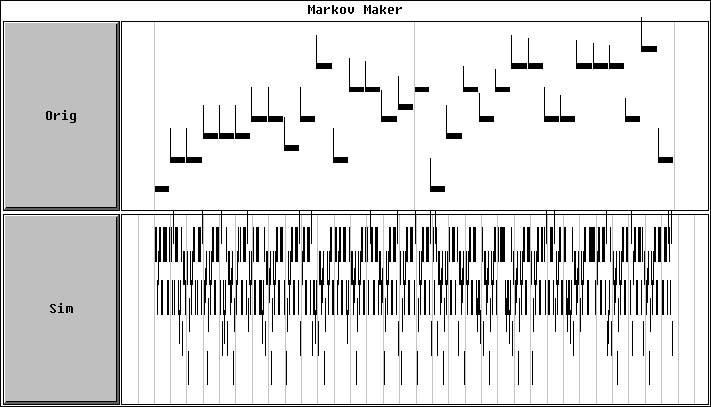
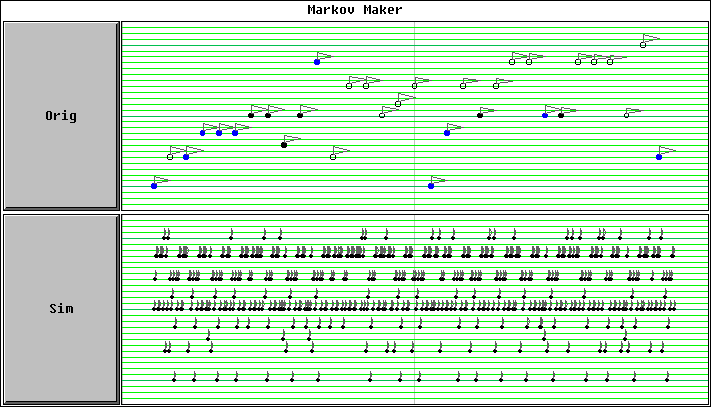
This make it possible, for example, to toggle between these two views of a Markov Maker tool:
-- Back --


